Tuesday, March 26, 2013

Homemade Toothpaste

Do you ever wish you teeth were just a 
bit whiter than they are?

You don't need any of those $very$ expensive whiteners.
All you need are some handy household items we all have in our cupboards.

One item is Baking soda.
Baking Soda alone can do the job. And in fact Baking Soda will not only whiten
your teeth it will also clean them as well.
From the 18th century, to the modern day toothpaste, baking soda was used as a cleaning agent!
When dissolved in water baking soda whitens and cleans by scraping off the yellow and brown stains that form with age and wear.

1 tsp baking powder
pinch of salt
Add water enough water to make a paste and brush your teeth like you would normally. Rinse your mouth out with water.

You will feel a tingling sensation while you are brushing, but this is normal.
Brushing with baking soda should not be done more than once a week because it can be quite abrasive and damage your tooth enamel if used too often.

Another item in your cupboard that can whiten your 
teeth is peroxide.
After brushing your teeth
 pour about 1/8 of a cup of peroxide into a container.
Swish some in your mouth for about one minute.
Continue until you have used all the peroxide in the cup.
You will feel bubbling fizzy feeling from the peroxide, this is normal.
After you are done
rinse your mouth out with water until you do not experience the bubbly fizzy feeling anymore.
It will take about 2 weeks to notice the your teeth getting whiter.

I am not a lover of the flavor of baking soda so I did some experimenting and
and came up with this recipe that I use at least once week.

*1/2 cup baking power
*2 tsp sea salt (fine)
Salt can also be used as a whitener, a cleanser, and kills bacteria in your mouth.

*1 Tbsp Orange peel power 
Orange Peel Powder is can be slightly abrasive like sea salt.
I bought Orange Peel Powder at Organic Creations.

*2 Tbsp Splenda (Your own choice to use or not)
(in my research Splenda was found to NOT promote tooth decay)
(Splenda took the edge off of the baking soda taste for me)

I mixed all of the ingredients and put it in a small container.
I add a few drops of Peroxide in a bathroom cup and mix in the above
power until it makes a paste. 
This will make just enough for
one brushing. 
When you are done
rinse out your mouth with water.

I also brush as normal with FDA approved toothpaste.

In a couple of weeks my teeth were definitely whiter, and
a friend complimented on the fact! 

Thanks for stopping by!
ValerieAnn


Monday, March 18, 2013

Rosehip & Jasmine Soap

I call this soap 
'Jazzy Rose'.

I had a sample of 'Rosehip & Jasmine' and thought I would
try it out in a all Goats Milk soap.

I used a 'Pringles' can and decided to cut it in
thirds, and then long ways.

Ingredients:
Cocoa Butter
Cottonseed Oil
Olive Oil
Shea Butter
Soybean Oil
and Beeswax

Fresh Goats milk
Sodium Hydroxide
Titanium Dioxide and Pink Kaolin Clay for color.

*Milder than red clay, but slightly more "pulling" than white clay - pink clay has the ability to absorb dirt, oil and bacteria from your pores. Pink clay is best suited for "normal" skin types.  


Fragrance: Rosehip & Jasmine from Brambleberry.com.
It is a very nice scent. Both fragrances comes through without one
over powering the other, or your nose!

I added a different color to each container and blended well. 

It became thick fast, so I had to spoon in each layer and pound
it down on the counter top to get it blended.


Happy Monday!
ValerieAnn


Wednesday, March 13, 2013

Update on: Making your own Tallow / Milk & Honey Soap


This is an update on the 'Milk & Honey' soap.

I am finding out one thing about goats milk.
You never know, in the end, what color your soap will be.

The last batch of Milk & Honey soap I made I did a cold process/hot process method.
It was my first time doing this method and did not understand the process totally, 
but
I figured it would not hurt to try. 
Well.....
The color came out totally different from what I thought it was going to be! 
It made a pretty, two toned shades of cream soap (I added Titanium Dioxide to lighten on half up) 
in the oven and it came out a deep chocolate color on one side
and a lighter chocolate on the other side and ya....WOW.... I thought I blew!  

This time making Milk & Honey soap I decided to prevent gel totally and
put the mold in my refrigerator for a few hours. It stayed a beautiful color!
I was very excited about the shade this soap was going to be this time.
Well.....
I cut the soap the next day and put it aside to cure.
and........
Four days later I went to check on the soap and this is what i found....
two toned chocolate soap! Wow....again! I knew I didn't blow it this time!

Along with the scent I put in this soap, the sugar in the goats milk won out and turned the soap a totally different color!
I know now that the fragrance oil alone that was the culprit! 

The bar cures very hard, and although this soap has no chocolate in it there is just a hint of that scent!

 In this picture, on the right, is the bar that I first time I made when I thought I blew it.
And the bar I made a few days ago - is the one on the left!
Amazing!
In the end, I am very happy with the way this bar of soap turned out!

Happy Wednesday to you!
ValerieAnn

Saturday, March 9, 2013

Making your own Tallow / Milk & Honey Soap

This week I rendered 12 lbs of beef fat and got just about 6 lbs Tallow out of it!

photo.JPG photo.JPG photo.JPG photo.JPG
Tallow (as well as lard: pig fat) was used in soap making by the pioneers.

Although Tallow adds little conditioning to the skin it is definitely very mild.

Reading the ingredients on commercial detergent bars you will find it has 'sodium tallowate'

In it Which is the scientific name for saponified tallow.
Tallow makes small creamy bubbles, But when you add other oils to it the lather is incredible!
In the end you will have a very hard, long lasting bar of soap thanks to Tallow.

I made  
'Milk & Honey' Soap 
with Tallow in my recipe,

Tallow at: 23.53%
I added vitamin packed Olive Oil at a 50.98% amount.
Also added was:
 Cocoa Butter that has wonderful soothing & emollient qualities: 3.92%
Almond Oil has skin conditioning properties as well as vitamins & minerals: 5.88%
Castor Oil acts as a humecent by attracting and retaining moisture to the skin: 1.96%
Coconut Oil helps with lather and hardness of your bar of soap: 13.73%

*(you don't want to use much more than 20% of coconut oil in your recipe because it can tend to cause your skin to dry out)

19 oz Goats Milk
6.87 oz of sodium hydroxide
Fragrance oil I used (you can choose your own favourite) Oatmilk & Honey/Vanilla

I did not want this soap to gel so I put it in the refrigerator for few hours.

photo.JPG
Cut soap the next day. (it was a little soft and could have waited another day or two, but I am like a little kid ......I have to see it now! LOL)
Now look at those bubbles!


Have a great weekend!

ValerieAnn


Monday, March 4, 2013

Jasmines Bloom


I am sure we all have ordered fragrance or essential oils that we intend to use sometime.
This was my 'sometime' for Jasmine.
I googled to find some pictures of the Jasmine flower to inspire me in making  this soap.
Most Jasmine flowers have white petals.
 

Some Jasmine petals had a bit of yellow in the center of them.


There were a few Jasmine that were yellow.


Then there was Jasmine that were white & with the Stamens that was yellow.

 
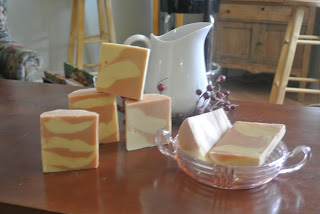
In the end I decided to make the soap two toned yellow soap with some white and a bit of green for the foliage.

I decided to make this a vegan soap. The oils I used were:

Cocoa Butter

Coconut Oil
Shea Butter
Soybean Oil
and Sunflower Oil


I used Arizona rain water

Sodium Hydroxide
and Jasmine Fragrance Oil from 'Essential Depot'.


The soap was at very light trace, and I could have waited a bit longer before I poured, but decided to just go ahead.


I did a layering pour where I poured a line of soap down the center of the mold, and then poured a different color down the center of the first color I poured and so on, until all was poured but a bit that I dribbled on to top it off. I spooned the edges toward the middle of the soap.

I added some sugar sprinkles on top and a bit of glitter.

                It comes out of the mold very soft, but hardens up great in the   
                                       four week curing time!

This is what the final bar looked like.


This was a four pound batch of soap, and
I used about 4 Tbsp on Jasmine Fragrance Oil. It was pretty strong. If you want a more mellow scent I would suggest using less, if you were to buy the fragrance from Essential Depot. 


Have a great Monday!
ValerieAnn